Navigation
Lanayru Province
─────── Any% ───────
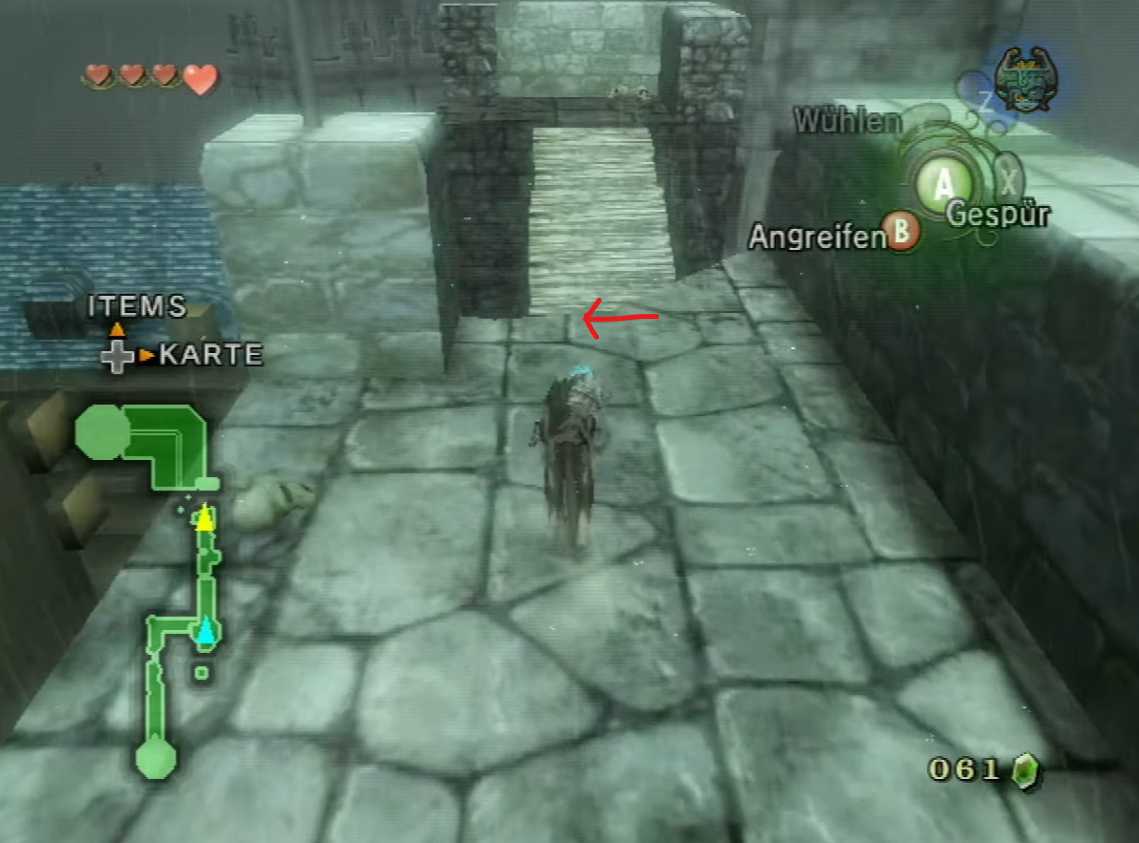
Descending Zora's Domain
without taking damage
When heading to Peak Province, this movement is a little over 1s faster than jumping into the water and climbing back out. Hold back on the control stick during the first jump to shorten it so Link doesn't overshoot the platform. When heading to Upper Zora's River, this is almost exactly the same speed as both jumping in the water and jumping to both yellow rupees, the upper ledge, and then the lowest ground.
Broken Louise camera
By doing a precise B attack into the cutscene trigger, the camera angle will stay locked and make Louise's text start earlier than normal. This saves about 1.7 seconds over watching the cutscene normally.
Rope skip
Upon entering Telma's bar after talking to Louise, skip the cutscene as soon as possible. Sidehop right, then dash off the edge to grab right side of the rope. If timed correctly, the Goron will not catch Link; for a human, this usually means executing rope skip quickly, but it is possible to get caught by the Goron both by going too fast and by going too slowly.
Bottom of the tower
There is a bulblin archer at the bottom of the tower before the very first rope, and while it is possible to ascend the tower without killing this bulblin, it will almost always snipe Link down from higher ropes if left alive. To kill it quickly, dodge the first arrow or deflect it with a B attack or spin attack, and then when it scurries away from Link, jump attack or spin attack to knock it into the water and kill it. If the bulblin doesn't move towards the water for any reason, kill it with 2 neutral B attacks and then a jump attack or spin attack instead.
Deflecting the arrow
Dodging the arrow
Archer Kill Skip
Discovered by Simikins
There is actually a method to skip killing the bulblin archer entirely. This is incredibly difficult to do and is not recommended for RTA attempts, but it is shown here for completeness's sake.
Early wind cycle
On the rooftops, it is possible with good movement to jump diagonally from the bridge to make an earlier wind cycle than was intended.
The bridge is notorious for allowing Link to fall straight through and void. To help avoid this, line Link up with the line on the ground indicated in the image below.
Mailman Skip Castle Town
There is a mailman trigger on the bridge that enters Castle Town. It is very thin and easy to LJA over. Stand next to the 3rd post from the chain that connects to the bridge, aim slightly up and roughly parallel to the bridge, and LJA once the boomerang is over the void.
Easy Mailman Skip setup
Plumm cutscene skip
Discovered by Zac
It is possible to howl to begin Plumm's minigame without ever having spoken to Plumm by climbing out of the water in the right spot and pressing A with the control stick neutral. The frame window for the A press to howl is variable, likely depending on climbing position, and ranges at least from 4f to 10f. The fastest way to do this is to jump attack (recommended) or sidehop over the trigger on the right side of the bridge, jump into the water, and climb out, saving ~6s over watching the cutscene; another way is to skip the bridge entirely and swim all the way to the grass, saving ~3s over watching the cutscene.
Enter Lakebed Temple from empty Lake Hylia
Discovered by pokemongenius and bewildebeest
With Lake Hylia empty, it is possible to enter Lakebed Temple with a bomb boost while or after destroying the rock at the dungeon entrance. It is also possible to break the entrance rock with the ball & chain from the bottom of the lake, and also to get to the entrance with a precise jumpstrike LJA from some collision on the right side of the entrance.
Method 1 - bomb boost while destroying rock
Setup by Nimzo and Doopsie
Note that ESS position allows Link to perform sidehops and backflips without moving at all in between them. The easiest way to find ESS position is to hold L and gradually shift the control stick away from neutral, then hold it steady once the jump prompt appears on the screen. All sidehops and backflips in the setup can be done by flicking the control stick carefully to avoid moving between them if desired. If tapping sidehops/backflips, A must be pressed on either the first or second frame that the control stick is held for all moves; pressing A on the third frame or beyond for any move will make the setup not work.
- Dash to the position shown in the video and transform
- Roll to grab the ledge, then drop (angle 12894)
- (Remove iron boots before performing next step)
- Hold L and left to sidewalk into the wall, then sidehop into it and release the control stick (x-pos -87888.1562)
- ESS sidehop right x1 (x-pos -88072.1719)
- ESS backflip x1, not releasing L until after landing (x-pos -88386.9375); if you did release L before landing, fully press L again and release it before continuing
- Flick downwards to turn 180 degrees (angle 45671) (see notes on turning around to avoid failed turns)
- Enter first person and buffer an angle change to angle 41063
- ESS sidehop left x4 (x-pos -89740.3125)
- Dry roll (L+A without control stick) x3, hesitating to come to a complete stop after each roll (x-pos -90705.8828)
- Enter first person, hold up on control stick, and pull out a bomb
- Press B, X, or Y (to pull sword, boomerang, or bomb) within a 3 frame window when Link is near the rock to blow it up and bomb boost into the alcove; note that the bomb button will not work if there are already 3 bombs out that haven't yet exploded
- As shown in the video below, holding and/or tapping L while jumping down to the rock can provide a good view to help time the B/X/Y press. This is not required; see below for a visual cue for the B/X/Y press without targeting at all between pulling out the bomb and pressing B/X/Y.
The demonstration video below adds some suggested bomb drops along the way that don't cost any time for a route that is trying to empty the bomb bag.
Visual cue for B/X/Y press without targeting by iwabi74
Assuming the setup was done correctly, pressing B/X/Y before this 3 frame window will make the bomb explode above Link without hitting him, and pressing after this window will cause Link to get hit by the bomb but fall down below the dungeon entrance.

Note that the angle shown in the watches on the right is 41849 because Link's angle changes while running on the pillar between the two jumps when not holding target. Beginning to target before the first jump and holding or tapping target through the jumps will result in an angle of 41073, which works for the trick but has a different visual cue from the one shown above. However, beginning to hold target while in first person before pulling the bomb will result in an angle of 41063 (same as before the c-up), which can blow up the entrance rock but does not work for the bomb boost.
Example on Wii
Method 1 backups
41063 backup by Nimzo
The video below demonstrates a method of reaching the correct position for step 11 of the setup above having made a position-related mistake after achieving angle 41063 in step 8, which may happen with a failed ESS sidehop or in other ways. Holding L to maintain the correct angle, get back into the corner Link originally dropped down into and sidehop into it for consistent position. Sidehop left once, dry roll once, sidehop left four times, dry roll twice, and finally target slash three times. From here, resume with step 11 of the main setup above.
Lost angle backup by Nimzo
This backup is an entirely separate setup for entering Lakebed from Empty Lake Hylia, and as it is done from the lower level, it can be used as a backup for losing track of Link's angle during the main method 1 setup above. This setup is relegated to backup status because it is slower than both method 1 and method 2. Note that method 2 also works as a lost angle backup and is faster than this setup, but some runners may find this setup easier to execute.
- Ledge grab on the side of the corner shown in the video (not precise)
- Climb and hold target and right to sidewalk and grab the other ledge, then climb again
- Dry roll (L+A without control stick) x3, hesitating to come to a complete stop after each roll
- Chain 3 targeted slashes in a combo
- Enter first person and buffer an angle change to angle 41378
- ESS backflip and pull boomerang to get the sword out of Link's hand
- Dry roll x1
- Resume with step 11 of the main setup above
Method 2 - bomb boost after destroying rock
Setup by pokemongenius and bewildebeest
This method is no longer recommended, as it is slower and more difficult than method 1. See bomb boost frame data.
Tutorial by bewildebeest
Get 60 rupees from Fyer's cannon
If you want to avoid text from the red rupee on the front of the cannon, jump attack just before the boomerang returns to Link.
French Fyer Discount
Normally, Fyer charges 300 rupees to repair the Sky Cannon. However, if the game is in French, Fyer will fix the cannon for free if you fail to pay him the first time and then talk to him again, as shown in the video. Note that 'Oui' is faster than 'Non' on his first text prompt even though he won't fix the cannon after that prompt. This can be done on GCN PAL and Wii PAL or NTSC-U 1.2 with the language set to French.
────── Any% [Wii] ──────
Cucco Minigame Floor Clip
Discovered by Quaforce
It is possible to clip through the wall in the Flight By Fowl house and fall into Lake Hylia.
Note that the video shows TPHD, in which the clip significantly easier due to removed sword recoil.
Mailman Skip outside of Castle Town (1.0 Only)
There is a mailman trigger on the bridge that enters Castle Town. On NA Wii 1.0, mailman triggers are thinner and thus possible to simply jump attack or B attack (4f faster) over. See video below for a full speed visual cue. Note that it isn't worth dashing a second time before the jump, as that will prevent the ability to dash right away after landing from the jump.
cues by meewix
─────── 100% ───────
King Bulblin 2
The King Bulblin 2 fight and fight skips can be found on the King Bulblin boss fights page.
Skip 2nd part of wagon escort (LJA)
After using the boomerang to kill the first bomb-dropping kargarok, the Midna text preventing Link from heading to Kakariko is removed and the wagon can be abandoned. However, there is still a Midna trigger just beyond the gate to Kakariko that forces Link to go back. In some categories, this auto-walk also makes Link walk into the King Bulblin 1 trigger, necessitating warping back to Castle Town and completely restarting the wagon escort.
If the KB1 trigger is present, open the gate target the boomerang high on the rock wall to the right of the path to Kakariko. LJA when the boomerang reaches the wall. To then skip the Midna text trigger, stand near it and up against the rock wall. Throw the boomerang along the wall, then LJA when the boomerang is inside of the wall, over a void.
A safer alternative for skipping the KB1 trigger and getting in position for the LJA over the Midna text trigger is to transform wolf, dig under the gate, transform human, sidehop right 4 times, and then L-roll forward twice. This is about 10s slower than the method described above.
King Bulblin 1 Trigger Skip
Discovered by FirnenLegacy
Originally discovered as an alternative for the Wii version, it is possible to get around the King Bulblin 1 trigger by opening the gate to get rid of the Midna text, then immediately digging under it. Align Wolf Link as shown (angle is not precise). Press A to open the gate, then immediately turn Link up-left and press dig. The window is a few frames, but keep in mind the dig spot is huge. After digging, hold away from the gate so that Wolf Link does not clip back inwards.
As a note, this trick is very costly to fail as there is no way (on Wii) to get around the gate afterwards. You will have to void in the gorge and restart back from Great Bridge of Hylia to retry.
Easy HP platform drop
If Link grabs the ledge near the chest with a normal camera, the camera will face straight down, making it much easier to time the drop.
Fast waterfall poe movement
Midna jump up and lure the poe.
Iza 1 Skip
Discovered by Dragonbane0
The method for doing this trick is very similar to Infinite Bomb Arrows. A full description of this trick can be found here.
Iza 2 minigame
Tutorial by bewildebeest
Clawshot Clip
In the water, hold L and the clawshot button, then sideswim into a slope. The angle is not precise at all. This can be done with any armor on.
This can be used for a slower method of Iza 1 Skip or to start the Iza 2 minigame after completing Iza 1 Skip and getting Iza's Bomb Bag.
Fishing Hole bottle
A bottle is retrievable by fishing in the enclosed water In Hena's Fishing Hole. Watch the end of the fishing line for the bottle to appear briefly when the "FISH ON!" prompt appears. There is a 50% chance of bottle for every FISH ON! assuming no fish have been caught. If a player catches too many fish, this may make the bottle never appear until after a console reset.

North Field grotto for 100%
If both poes are hit by the same movement in a Midna charge, it usually isn't possible to collect both souls before one poe recovers. However, Midna charging from a point on the right side of the grotto (see video) will knock the poes down in separate movements within the same Midna charge. To collect both souls before either poe recovers, target and collect the souls of the poes in the order they were knocked down.
Ice Puzzle Cave solutions
Ice Puzzle Cave puzzle skips
with point blank displacement clips
developed by xein and NotableCass
This method saves around 62s over solving the puzzles and is easier than the method without displacement clips shown below. Get the correct angle for a point blank displacement clip at the first gate by following the steps below, then simply hold target to maintain this angle while moving to the next gates to clip past them the same way.
- Begin facing 32768 (north)
- Between breaking the ice and reaching the first gate, 2k roll left for angle 34768
-
C-up cancel for angle 34750; this must be done while not right up against the gate, and it's most consistent not to instantly c-up cancel but to wait until the camera is aiming down a bit
- Target walk up to the gate
- C-up cancel at the gate for angle 34650; to get the correct angle, this cancel must be done quickly after beginning to hold up to aim down
- Vertical slash (target slash) from up against the gate to clip, and mash B to jumpslash to the other side
- Pull boomerang to be able to roll between gates, but make sure to keep holding target to preserve angle 34650; if lost, this angle can be found again by normalizing to face north/south by grabbing a block, then repeating the steps above
- Clip and jumpslash past the remaining gates
with rollstab displacement clips
This method saves 50s over solving the puzzles and is easier than the method without displacement clips shown below but slower than the point blank displacement clip method above. Use displacement clips with the standard rollstab setup to skip all three puzzles. See notes on displacement clip setups. Since puzzle 2 has two gates, half of the puzzle must be completed so that the displacement clip doesn't land Link in jail. This is still faster than using moon boots.
Comparison with point blank method
without displacement clips
Discovered by Adam
Developed by jeez, bewildebeest, and EJ
The methods of skipping the puzzles shown here save 43s over solving the puzzles and are slower and more difficult than the method with displacement clips shown above. Skips without moon boots shown here.
- Jump strike moon boots bomb boost onto block (either moon boots frame can work)
- LJA to skip 1st puzzle
- Jump as wolf to 2nd puzzle blocks (doing another moon boots bomb boost onto the 2nd puzzle blocks is a few seconds slower, but works as a backup for falling)
- LJA to skip 2nd puzzle or JSLJA for safety (see section below)
- Autojump off of the 2nd puzzle gates without rolling, as an accidental ledge grab and then pressing A to drop will get Link stuck between the two gates, which is very bad
- Stand near front of switch (not extremely precise, but should be nearly as far forward as possible)
- C-up and aim all the way down, then adjust the vertical angle slightly upward to within the range 9997-9937 (inclusive)
- Hold c-up and press A 10 times to buffer the vertical angle to the working LJA range of 183-176
- Target 5 times on the chest
- Double LJA
With jump strike, the second LJA is frame perfect, 23f after the first LJA's A press. A metronome can help with consistency in timing it. If using a metronome:
- Set the metronome to 250bpm
- After releasing the boomerang in step 10 above, pull sword and hold A to begin charging a jumpstrike
- Once the boomerang is over the chest, pull the item wheel; this should happen before the jumpstrike is fully charged
- Begin tapping along with the metronome with a B press to close the item wheel, then A presses from there
This is easier than timing two jump attacks with jump strike because each timed jump attack requires pressing A for no more than 1 frame. Since this strategy buffers the first jump attack by releasing a jumpstrike before it is fully charged, it leaves only one 1f jump attack rather than two.
JSLJA to skip 2nd puzzle
Since it is possible for an LJA to land between the two gates and there isn't a great visual cue for avoiding this, it is safer to do a JSLJA instead at the cost of a few seconds.
- Stand at the line on the block as shown (not precise, just needs to be far enough from north edge for Jump Strike to work)
- Make three dummy targets so the boomerang isn't already returning by the time the Jump Strike is charged
- Target above the corner in the wall shown in the video
- Turn to face the gates before releasing the boomerang
- JSLJA once the boomerang is at the final target(s)
Spinner Track HP Timesaver
Jumping from the track to the HP chest instead of going around the corner saves around 1s.
LJA to 100R chest
In the field west of Castle Town there is a run-down area to the south with a chest on a pillar. It is possible to LJA to this chest, skipping using the dominion rod. Aim slightly above the wall so the boomerang goes over, then LJA as soon as possible.
Backslice jump to 100R chest
Sidehop + roll onto the ledge, then hold forward to jump off. It is only possible for Link to get a jump if his sliding animation starts high enough on the sloped wall; a backslice less parallel to the wall will make Link start sliding down low on the slope, where it is impossible to get a jump. During the jump, time a B press to jump attack onto the chest platform.
Fast learning Jump Strike & Great Spin
Discovered By SVA161620
When learning Jump Strike, it is 3.33s faster to spin-attack after doing the Jump Strike as it prevents the real Hero's Shade from getting knocked down. It is also possible to release the Jump Strike without fully charging it and still get a Jump Strike, unlike in the overworld where this would result in a normal jump attack.
When leaning Great Spin, it is 2.73s faster to backflip into the greatspin rather than just greatspinning. Once again, this is because it doesn't knock down the real Hero's Shade. As when learning Jump Strike, it is also possible to release the Jump Strike without fully charging it and still get a Jump Strike, unlike in the overworld where this would result in a normal jump attack.
Mailman Skips Lanayru Bridge towards Castle Town
There are two mailman triggers on Lanayru Bridge. It is possible to LJA over both of the triggers by throwing the boomerang just over the side of the bridge from near the trigger.
The first trigger is just after the second broken arch on the right-hand side of the bridge. For the second trigger, go to the second non-broken arch on the right-hand side after the crack in the floor; from here, edge Link forward a little more to the second big brick after the arch.
Small timesave for STAR 1
Discovered by ZachLink99
Rolling and jumping across the platforms saves 1s.
Telma Cutscene Skip/TD for GCN
More information about this trick can be found on the Text Displacement page.
Wooden Statue Animation Skip
Normally, the statue has a bouncing animation when it spawns, but this can be skipped by position Link on the ground exactly where that bouncing animation would begin. This is somewhat precise, and visual cues on the ground can be hard to see.
─────── Misc. ───────
Enter Lakebed Temple with one water bomb
Throwing the bomb from the position and angle shown in the video at roughly the 5th red flash can blow up the rock without blowing up the vent beneath.
Falbi text dive
Standing near the edge and talking to Falbi will result in Link falling during the text and going underneath the floor collision.
Epona Seam Clip in North Field
By riding Epona precisely into the corner of the ledge, it is possible to ride Epona through the collision and OoB.
LJA over South Field Midna trigger
LJA to Lanayru statue chest
A slightly precise LJA can reach the 100R chest on the cliff without moving the statue with the dominion rod.
LJA to cliff poe and chest
NorGor (Goron Bomb Bag without water bombs)
Discovered by YellowTorpedo
Using the Normal Bombs Underwater glitch and starting a cutscene at the same time, it's possible to sink a normal bomb low enough to blow up the rock with the Goron in it.
Flight by Fowl awning clip
discovered by Paraxade
with cucco
discovered by bewildebeest