Navigation
Hyrule Castle
For boss and miniboss strategies, see the pages for King Bulblin and Ganondorf.
──── Any%/All Dungeons ────
Barrier 1 with bombs
If you have bombs, you can kill all the bokoblins with one bomb. Pull a bomb shortly before hitting the cutscene trigger (11 rolls from the entrance). After the cutscene, pick up the bomb, avoid the swings from the first pair of bokoblins, and then stand in the center and wait for the bomb to explode and kill all five. Alternatively, pull the bomb after hitting the cutscene trigger instead, then simply stand in place without doing anything until it explodes.
Barrier 1 with ball & chain
Slash the front two bokoblins 3 times, roll back twice, then wait for the 2nd set of bokoblins to come near you. Slash the 2nd set 3 times, then throw the Ball & Chain at all of them.
Skip Barrier 1
With Jumpstrike
Discovered by Dragonbane
If you collect a rupee while charging a jumpstrike or during a jumpstrike, you will delay the text until you land (if during charge up, you will auto jumpstrike), Furthermore it also disables all triggers as the rupee text is queued up next.
Doing this skip requires yellow rupee text not to be cleared previously. Break the box in the left corner at the main doors and boomerang the rupee, then target above to delay the rupee, leaving time to roll. While the rupee is coming to you, roll to the very edge of the barrier 1 trigger (use the corner as a visual cue) and then start charging a jumpstrike. The rupee will hit you and you will auto jumpstrike over the trigger, allowing you to skip it. Later, after King Bulblin 4, savewarp to avoid hitting the barrier trigger on the way back, as it still exists.
With Back Slice Moon Boots
Requires Back Slice and the Magic Armor, and you need to be at 0 rupees at the time of the trick to get weighed down. Unequipping the magic armor is frame perfect. See moon boots for more info.
Faster example where rupees run out when the back slice begins, skipping having to equip magic armor after initiating the back slice
LJA method (GCN only)
Discovered by Paraxade
This is recommended for RTA with a setup (see below) if approaching the barrier without jumpstrike. It saves around ~2.1 seconds in GCN Any%; 1.6 from the trick itself and 0.5 from having boots on the item HUD for chandelier room without having to do an extra equip.
- Have sword out
- Climb the ledge by the corner approaching from the right and target (release the stick before he climbs all the way up to prevent analog glitch) (z = ~6603 to 6604)
- While still holding target, hold downright to climb again. You need to hold a little bit down of perfect downright to be able to grab the ledge
- Climb back up (z = ~6635 to 6640)
- Wait for the climbing animation to finish as to not abridge it, then turn around
- C-Up and look all the way up and a bit to the right until facing between 39800 and 41600 (visual cue)
- Press A while holding c-up to adjust the angle
- Throw Boomerang and LJA quickly (not immediately, wait a tiny bit after the earliest time that you can LJA)
Tutorial by bdamja
Superjump method (non-LJA alternative)
Discovered by LogitechSDAZ
From the main entrance to the Hyrule Castle courtyard, head over to the left (GCN). Stand near the bush wall and lure a kargarok to come near you. Use an attack to knock the kargarok on the other side of the bush wall and target him with an area attack. Back up a bit, then use the the area attack to superjump over the bush wall and past the barrier.
Skip Barrier 2
Roll straight into the trigger for the barrier and skip the cutscene immediately, then roll back out before the barrier forms. On the way back, you can just walk inside the barrier wall as it is only one sided.
King Bulblin 4 Midna text skip
Discovered by Rodner
After King Bulblin is defeated there is a one frame window to backflip before Midna pops up. Press start during the backflip before landing and savewarp.
Alternatively, you can use Iron Boots instead of a backflip. Savewarp before Link touches the ground again. This saves 6s.
If you fail the text skip, it is slightly faster to roll back than to savewarp, as shown in this video.
Skip Barrier 3
Jump Attack
This is by far the fastest and easiest way to skip this barrier. Jump attack towards the pillar on the right and mash start. You will skip the cutscene as soon as possible and because link is in the air he will not walk into the barrier. Then, head right to avoid entering the barrier accidentally.
Original ZSR demo video here
Ending Blow Moon Boots
This is slower than skipping the barrier entirely with a jump attack and is precise, so only use this as a backup. Head to the northeast and stand as far from the barrier as shown in the video, then put on the iron boots. Target a bokoblin and spin attack right as it's about to finish passing through the barrier. Without releasing target, walk towards the bokoblin until the A prompt to Finish appears, and then perform Ending Blow Moon Boots (EBMB) by pressing A while wearing the iron boots and then force unequipping the iron boots as soon as possible. This is precise because Link will be knocked back by the barrier if beginning the EBMB too close to it, the A prompt for ending blow will not appear unless Link is close enough to the bokoblin, and it's not possible to knock the bokoblin down closer to the barrier as letting it inside before spin attacking prevents it from being knocked out of the barrier at all. On top of that, Link will automatically untarget the downed bokoblin and instead target any upright bokoblins that approach inside the barrier.
Helm Splitter
This is slower than skipping the barrier entirely with a jump attack, so only use this as a backup in categories with helm splitter. Head over to the right side (GCN) and wait for the group of bokoblins to appear. Just as they enter the barrier, hit the first one with a shield attack and use the helm splitter to jump over the barrier. Link will sometimes hit the barrier during the helm splitter.
First room with single clawshot
It is possible by standing on the very edge of the railing to clawshot the chandelier without needing to clawshot the closer one first, this is very hard to do fast as you have to be right on the edge and not recommended
Failed Barrier Skip comparison
If you fail to skip the barrier in this room it is both faster and significantly easier to save warp and retry instead of fighting the horde of enemies.
First Darknut room
Strat by SVA161620
- Roll forwards twice and rollstab; one roll must be delayed a little bit or else the rollstab will hit the darknut's shield
- Slash 4 times (no combo)
- Running slash to make the darknut block
- Slash 6 times (no combo) to finish phase 1
- Sidehop while targeting to block the thrown sword
- Stand behind and to the right of the darknut and wait until it becomes vulnerable again shortly after the second sword comes out
- Slash twice
- Hit 3 times with the B&C to kill
To get the perfect boomerang angle, stand inside the diamond and aim towards the pillar, when camera pans back just throw the boomerang and it will hit the torch.
Extinguish Darknut torch before chest spawn
The torch to raise the platform can't be extinguished during the chest spawn cutscene, but it can be extinguished beforehand, and because the cutscene pauses the platform and there is a delay between the torch being extinguished and the platform beginning to rise, there is enough time to extinguish the torch before the cutscene and still make it to the platform, saving about 1.5s over throwing the boomerang after the cutscene.
On Wii, the torch can be targeted directly through the barrier. On GCN, this is only possible by throwing the boomerang at the wall above the torch. One way to time the throw is to stand roughly in the middle of the nearest unrisen platform as shown, target the wall above the torch, and release the boomerang a moment after the darknut explodes. If the darknut drops a rupee or arrows, there is a good cue in releasing the boomerang around when the drop hits the ground. Release too early and the platform will rise too much before you can get to it; too late and the boomerang won't hit the torch before the cutscene begins. The video below releases the boomerang on the later side of the working range. After the cutscene, be careful not to bonk the risen middle platform.
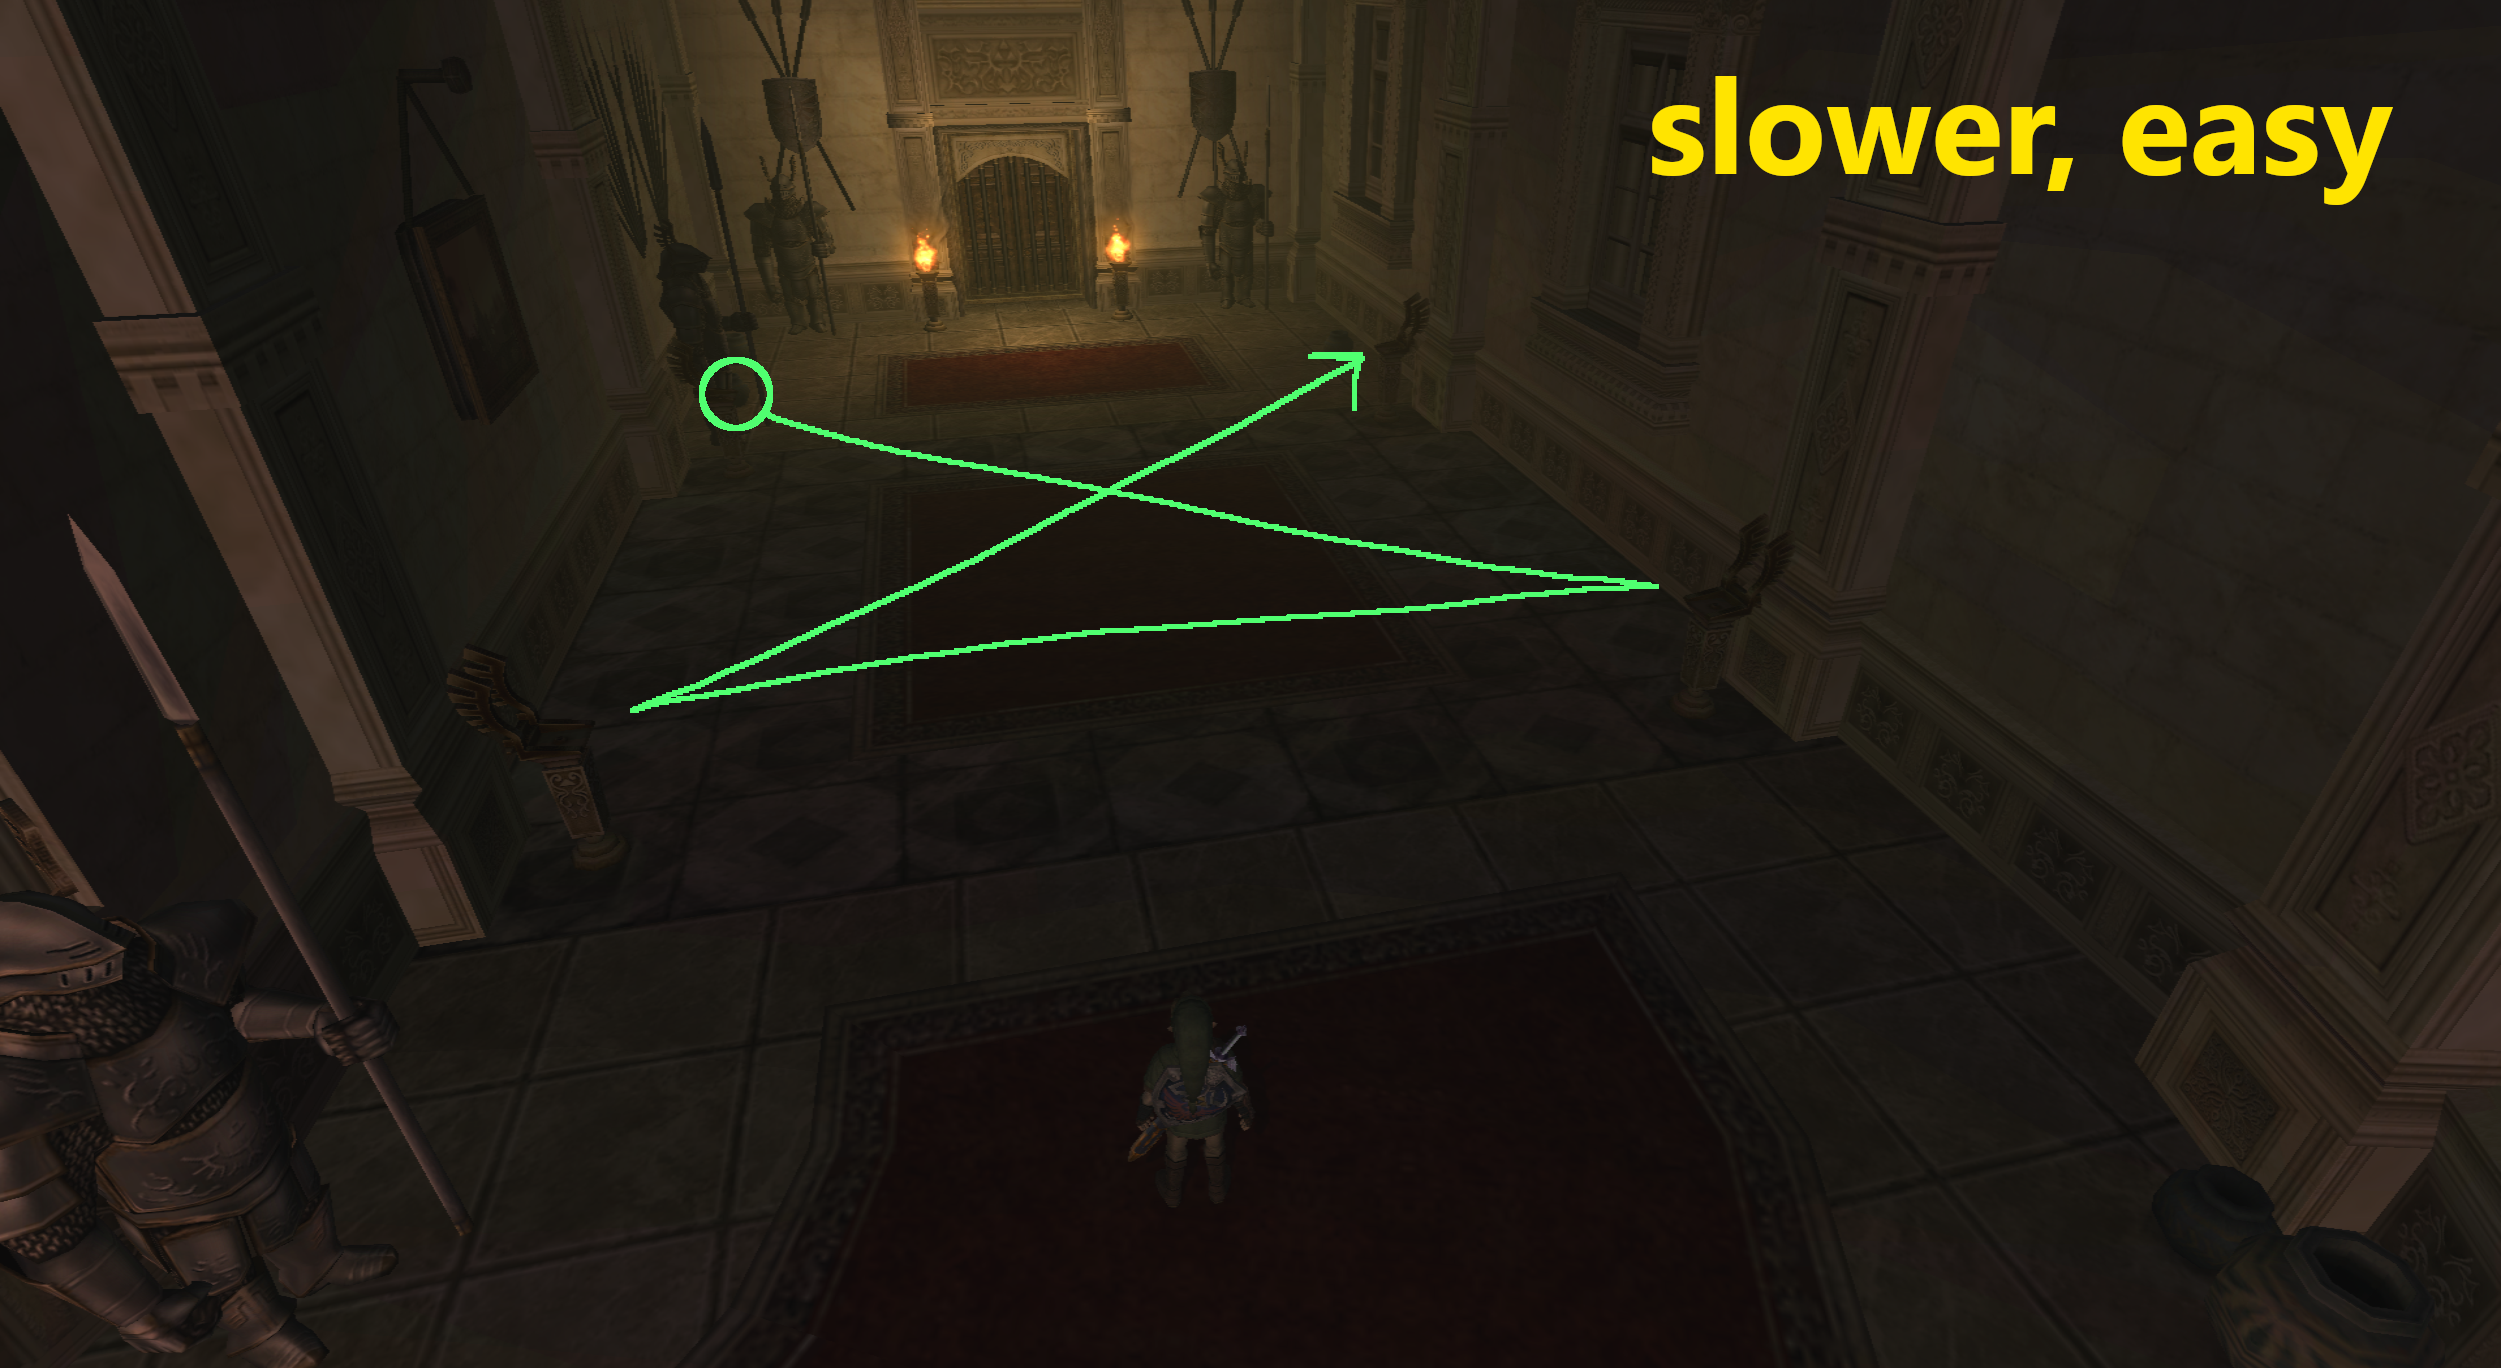
Torch room solutions
Fastest solution by Demon
There are multiple solutions for the torch puzzle room. The intended solution is very lenient on timing, and the fastest known solution is about 1s quicker, but the timing is somewhat tight:
Shown below are the visualized solutions (for Wii) for the torch puzzle.
Wii - Faster, tighter torch puzzle (NW, SE, NE, SW)

Wii - Slower, safer torch puzzle (SE, NW, NE, SW)
Dynalfos with bomb
The three methods shown below all take the same amount of time.
method 1
Skip the cutscene and begin running roughly around the perimeter of the room (hold up-left out of the fade) to run out the bomb's fuse. Just after the dynalfos on the right begins running towards Link, throw the bomb towards the two dynalfos; this will be around when Link passes the second suit of armor. The dynalfos will enter their animation of looking down at the bomb, but it will explode before they get a chance to run away.
method 2
This is the same as method 1 except that instead of running around the room to run out the bomb's fuse, you just wait in the middle of the room.
method 3
Alternatively you can just lure the dynalfos to you and pull a bomb as soon as they start running towards you. When they are close, slash the bomb or blow it up by throwing the gale. This can be up to 0.3s faster than throwing the bomb, but it is harder to do consistently and to consistently be in front of the door by the time the cutscene begins, and there's a very rare occurrence where the dynalfos will displacement clip you out of bounds through the door.
Dynalfos without bombs
Method 1:
Quickspin the Dynalfos, then stand right next to the left one. When they recover, chain stabs to kill both.
Method 2:
Run up to the Dynalfos and turn to the right. Perform neutral slashes 7 times, then quickspin to kill both.
Comparison:
Aeralfos fight with ball & chain
Discovered by Dragonbane and Garm
Enter the barrier and skip the cutscene as soon as possible. Hold L and throw the boomerang to make the aeralfos shield. It is safest to hesitate a split second before shooting the clawshot to bring the aeralfos down, as this lets the boomerang return to Link ahead of the aeralfos; if the boomerang hits the aeralfos while the clawshot is bringing it back to Link, the aeralfos will get stuck midair right in front of Link and will not be vulnerable. While the clawshot is in the air, equip B&C over the boomerang (don't equip over clawshot, as the automatic put away animation will hinder the strat), and begin swinging it as soon as possible. After you hit the aeralfos 5 times, throw the ball and chain, and it will kill the aeralfos on its way back if done correctly.
If the aeralfos dies during its quick stab attack, then its sword hitbox will remain active on its arm until it explodes.
Friendless
discovered by BigBen
The trigger for the cutscene on the way to the boss key is a cylinder that only extends a little beyond the left railing, and it's barely possible to bypass it and skip it. However, because the gate in front of the boss key chest only opens during the cutscene, getting the boss key and escaping afterwards are done with displacement clips.
bomb boost past trigger
discovered by BigBen
Video needed
jumpstrike LJA past trigger
discovered by minimini352
This saves around 25 seconds over watching the cutscene.
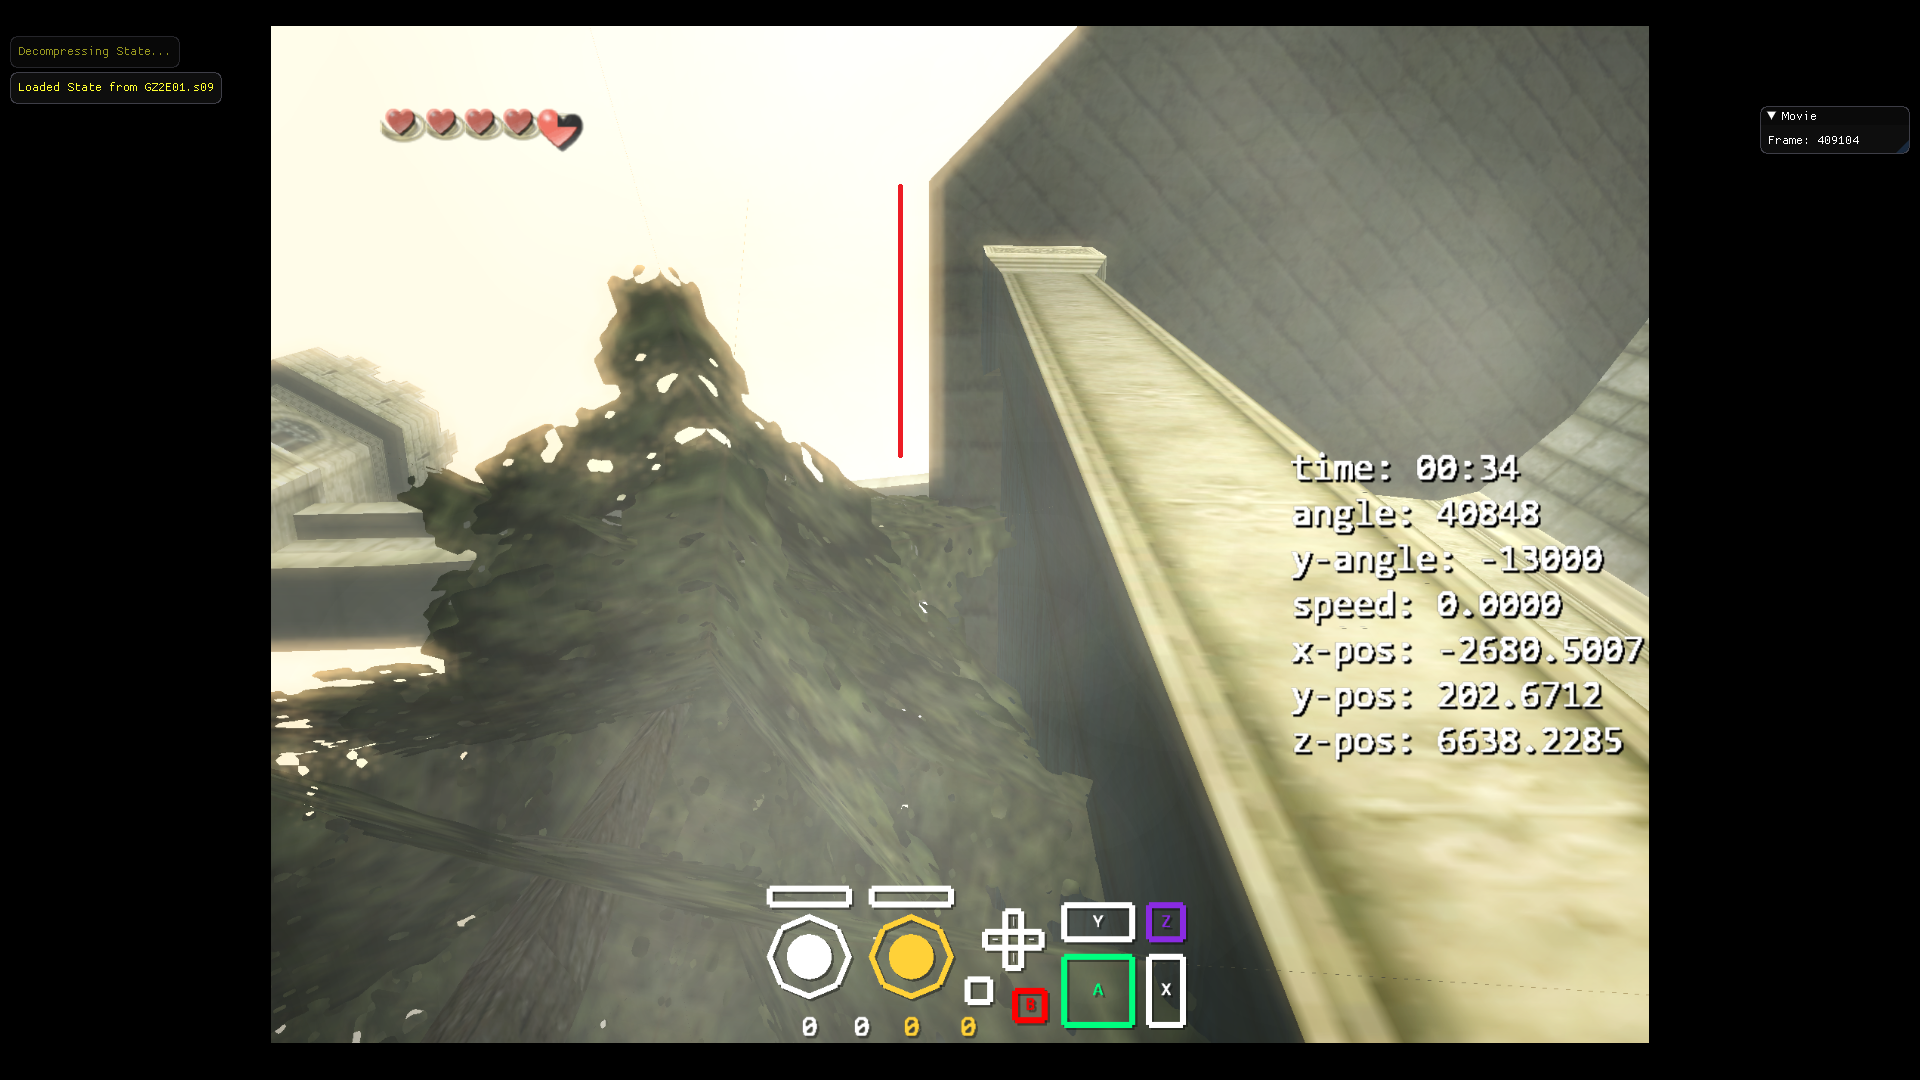
- LJA onto the tower by positioning Link just past the crossed lines shown in the video and targeting at least twice without aiming up or down; if he's in the right place, this will put the targets roughly on the boundary between the white tip of the tower and the blue tiling
- Walk low on the corner of the tower, being careful not to go too far and slip off
- Target the right railing of the bridge and then on the wall beyond high enough that the boomerang still gives a full speed JSLJA
- Before releasing the boomerang, aim so the middle of the reticle is just barely left of the second line on the railing past the broken section; it doesn't matter how high or low Link is looking for this step
- Release the boomerang and JSLJA when the boomerang has nearly reached the second target so Link ends up facing right of perpendicular to the bridge
- Mash B to jumpslash after the JSLJA lands; if done correctly, the JSLJA will land briefly, Link will slip off the railing backwards without a sliding animation, and then a jumpslash within the first several possible frames will get him back onto the railing
clip into boss key jail
setup by bewildebeest
Because the gate in front of the chest isn't cardinally aligned (faces angle 24576, exactly 45 degrees off cardinal), this point blank displacement clip setup is nonstandard.
- In or near the right corner, tap target twice to lock onto the second out of bounds invisible enemy for angle 63096
- If not already in corner, sidehop into corner
- Backflip and release target midair to maintain facing angle
- Retarget (not locked on anymore) and move/sidehop left to adjust position
- 2k dry roll right (tap right for 2 frames during roll) for angle 61096
- Diagonal slash from against the gate to clip
This alternative setup is very slightly slower and uses the iron boots, but it doesn't involve any frame perfect inputs. See video description for instructions.
clip out of boss key jail
setups by Thymewalk and xein
The video below shows two similar setups. For the first:
- Enter and exit first person
- Tap or ESS down to turn 180; must wait for Link to fully stop turning before proceeding
- Begin holding up to turn 180 again and run forwards at angle 24489
- At any point while running forwards, hold C-up and up and press A for 1 to 3 C-up cancels, then keep running forwards to reach angle 24458
- Target just before reaching the gate to avoid changing angle or locking onto an invisible enemy
- Backflip
- 2k dry roll left (tap left for 2 frames during the roll) for angle 26458
- Vertical slash from against the gate to clip
For the second:
- Enter and exit first person
- Walk forwards to the gate at angle 24561 or 24581 (either works)
- Target just before reaching the gate to avoid changing angle or locking onto an invisible enemy
- Backflip
- 2k dry roll right (tap right for 2 frames during the roll) for angle 22561 or 22581
- Enter and exit first person
- Turn 180 twice in quick succession for angle 22714
- C-up cancel while holding up for angle 22701 or 22694; must hold up for a moment before C-up canceling to get correct angle instead of canceling as soon as possible
- Vertical slash from against the gate to clip
- See 0:14 in this video for a slower setup that doesn't involve any frame perfect inputs. See video description for instructions.
- A backup exists for losing Link's starting position or angle: Sidehop onto the chest and slide down it to reattain angle 24576. From here, this video shows a different method of clipping out that relies on already having target held while standing at the chest.
Block room shortcut
As long as you don't stand on unstable blocks for too long you can just cut right across the room. To do this roll across and show in the video making sure you go diagonally so you don't stay on unstable blocks.
Last group of lizalfos (bomb arrow)
This only works for the last group of Lizalfos as they are closer together than the group below. Before spawning the barrier simply bomb-arrow the wall next to the right Lizalfos and it will kill both of them making the barrier disappear before you watched the cutscene to spawn it. This can be used in All Dungeons and 100%.
Skip final tower dynalfos with Spinner Barrier Clip
Discovered by ZachLink99
Using the damage invincibility granted by getting hit by the barrier, it's possible to clip through onto the spinner track with a spinner attack, skipping the Dynalfos.
Voiding out on the spinner tracks will respawn Link at the base of the tracks behind the Dynalfos and outside of the barrier trigger so you can safely go onto the tracks again.
Skip final Darknut fight
Discovered by Draconif
It is possible to skip the final Darknut fight by clawshotting the lantern right next to the boss door in Hyrule Castle. Get off the spinner early and position yourself carefully right before the barrier trigger in the spot shown, then simply clawshot the lantern target by the door. Skip the cutscene and open the door.
if you skip the cutscene too fast you will get knocked off by the barrier, so wait like a quarter second before skipping.
Original discovery video by DF here
──── 100% ────
Darknut Skip with Jumpstrike
Discovered By DragonBane
Collecting a rupee that gives text while charging a jumpstrike will cause the jumpstrike to automatically release as a jump attack, disabling all triggers until after Link reaches the ground and the rupee text is displayed. This can be used to skip triggering the barrier that forms around the darknut. Use the ball & chain to break both suits of armor on the right, then stand on the part of the floor shown in the video below. Aim the boomerang just left of the column, then release it without targeting. Pull sword with B, then hold A to begin charging a jumpstrike before the rupee gets back to Link. Some strange side effects of this skip include the darknut music playing until Link exits the castle, an invisible damage barrier appearing near the middle of the room, and the darknut sometimes teleporting towards Link.
Link to original video
Roll setup
setup by Pheenoh
After destroying the far armor from the corner between the wall and the near armor, line up the 10th/20th hearts with the column as shown, then dry roll. Link will now be in position for the boomerang throw and jumpstrike as described above.
──── Wii ────
Aeralfos fight
with Ball & Chain
Enter the barrier and skip the cutscene as soon as possible. Hold Z and throw the boomerang to make the aeralfos shield. It is safest to hesitate a split second before shooting the clawshot to bring the aeralfos down, as this lets the boomerang return to Link ahead of the aeralfos; if the boomerang hits the aeralfos while the clawshot is bringing it back to Link, the aeralfos will get stuck midair right in front of Link and will not be vulnerable. After clawshotting, let go of Z to untarget, and begin holding down on the stick. While the clawshot is in the air, equip B&C over an item that isn't the clawshots and set it to B. Once the clawshot returns, while still holding down on the stick, press A to exit aiming mode and then B immediately after to begin swinging the B&C (precise, but not frame perfect). Point towards the bottom left of the screen and begin turning left. After the B&C hits three times, throw it towards the aeralfos' feet, which should hit a fourth time. Defeat the aeralfos with one final sword attack (whether it dodges seems to be RNG). This strat saves 1-2s on average over killing the aeralfos with sword, not considering extra timesave from combining equips.
with Sword
Perform the same steps up until clawshotting the aeralfos. As soon as you can, take out the sword and perform a 4-hit combo (up-up-up-down). Other combos are either slower or cause attacks to miss. Move towards the middle of the bridge so that the aeralfos backhops into the wall. Wait a little bit for it to start its attack / become vulnerable, then do another 4-hit combo to kill the aeralfos (up-up-up-down). There is no RNG with this strat if done correctly.
──── Unused/TAS/Misc. ────
Skip East Wing Barrier
Discovered by spicyjuice04
The positioning is precise. This works because the trigger for the barrier to form is misaligned.
Double-Darknut Skip
Discovered by Nesman88
With precise clawshot aim it is possible to reach the Chest and Switch on the SW platform of the central chamber without having to defeat the two Darknuts for access. By clawshotting to the southern edge of the NE chandelier, then lowering down slightly (see video), you will have between 1 and 3 vertical pixels to reach the southernmost chandelier. From there, adjusting to the SW edge will let you reach the SW chandelier after again lowering down a bit (not precise).
Skip first lizalfos set in tower climb with 3pcc (Wii Only)
Discovered by bdamja
It's possible to skip the first set of lizalfos using a 3pcc. This doesn't realistically save time RTA because of the lizalfos pushing Link around, but may be fast in a TAS context.
Skip opening gates with chains
The gates before King Bulblin 4 and the graveyard small key chest can be skipped with standard setup displacement clips.